I’m playing with the Maxim MAX7456 Video On-Screen Display Generator for my Satellite Tracking Camera project. I’m wanting to use it to overlay accurate (GPS locked) time stamps onto each individual field of a PAL or NTSC video signal.
The Chip has a font set of 256 12×18 pixel characters of which most of them are Japanese characters and of no use to me. It’s surprisingly easy (albeit convoluted) to update the characters to something more useful. Of particular note, simple images spanning multiple characters and rows can be displayed as there is no invisible space between rows or colums.

I take advantage of the pgm file format, I suggest installing GIMP if you don’t have an image editor that creates pgm files.
The character I’m going to create is rather simple…

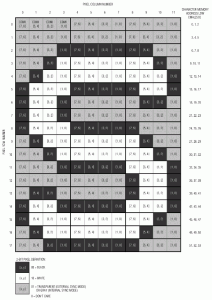
All Characters must be 12 pixels wide and 18 pixels high. Take a look at the following image from the MAX7456 datasheet.

Each character is made up of 54 bytes of data. Each pixel value is two bits, so each row of 12 pixels end up being 24 bits, or three bytes.
The image above also tells us the 2-bit pixel definitions:
00 = Black
10 = White
01 or 11 = Transparent
I’m going to use 01 for transparent pixels.
Now, you need a 12 x 18 pixel image. The best format for it is greyscale, where white is white, black is black and transparent is grey (I used 128 as the 8 bit luminosity value). Make sure the image is flattened, and save it as a pgm file. When asked, be sure to save as an ascii file.
Now, open the pgm file in a text editor. You’ll see something like:
P2
# CREATOR: GIMP PNM Filter Version 1.1
12 18
255
128
128
128
.....
The top four lines of this file are header information. You should have the “12 18” line in your file as this is the dimensions of the image.
The other numbers are pixel values from top left to bottom right. 0 Being Black, 255 White and 128 grey (transparent).
Delete the top four lines and do the following find-replaces to change these pixel values to the two bit binary values .
- Replace 0 With 00
- Replace 128 With 01
- Replace 255 With 10
Note that you must replace 0 with 00 first, otherwise you’ll have a problem due to the zeros you introduce with the following find-replaces.
You now have a 216 (12*18) line file of two bit pixel values from the top left to the bottom right of the character. I’ll leave it to you how to do the next step, but you need to combine four lines into one to give you 54 lines of 8 bit values.
Here is the first few lines of mine:
01010101
01010101
01010101
01000000
00000000
00000001
01001010
10101010
10100001
....
Now, the process to save this data to the chip is the following:
- Disable the On screen display (Set bit 3 to 0 of VM0 (0x09))
- Send the character number you want to display to CMAH (0x09)
- Do the following for bytes 0 to 53
-
- Send the byte number (0 to 53) to CMAL (0x0A)
- Send the Byte data to CMDI (0x0B)
- Send 0xA0 to CMM (0x08) to copy it to Non volatile memory
- Wait about 200 milliseconds
And here, without loops or anything else, in it’s longest form, is the AVRGCC code to overwrite character C0.
//Turn off the OSD spi_send_byte(0x00, 0b01000100); //Select the character you want to overwrite spi_send_byte(0x09,0xC0); //Send the 54 bytes spi_send_byte(0x0A,0); spi_send_byte(0x0B, 0b01010101); spi_send_byte(0x0A,1); spi_send_byte(0x0B, 0b01010101); spi_send_byte(0x0A,2); spi_send_byte(0x0B, 0b01010101); spi_send_byte(0x0A,3); spi_send_byte(0x0B, 0b01000000); spi_send_byte(0x0A,4); spi_send_byte(0x0B, 0b00000000); spi_send_byte(0x0A,5); spi_send_byte(0x0B, 0b00000001); spi_send_byte(0x0A,6); spi_send_byte(0x0B, 0b01001010); spi_send_byte(0x0A,7); spi_send_byte(0x0B, 0b10101010); spi_send_byte(0x0A,8); spi_send_byte(0x0B, 0b10100001); spi_send_byte(0x0A,9); spi_send_byte(0x0B, 0b01001001); spi_send_byte(0x0A,10); spi_send_byte(0x0B, 0b01010101); spi_send_byte(0x0A,11); spi_send_byte(0x0B, 0b01100001); spi_send_byte(0x0A,12); spi_send_byte(0x0B, 0b01001001); spi_send_byte(0x0A,13); spi_send_byte(0x0B, 0b00000000); spi_send_byte(0x0A,14); spi_send_byte(0x0B, 0b01100001); spi_send_byte(0x0A,15); spi_send_byte(0x0B, 0b01001001); spi_send_byte(0x0A,16); spi_send_byte(0x0B, 0b00101000); spi_send_byte(0x0A,17); spi_send_byte(0x0B, 0b01100001); spi_send_byte(0x0A,18); spi_send_byte(0x0B, 0b01001001); spi_send_byte(0x0A,19); spi_send_byte(0x0B, 0b00101000); spi_send_byte(0x0A,20); spi_send_byte(0x0B, 0b01100001); spi_send_byte(0x0A,21); spi_send_byte(0x0B, 0b01001001); spi_send_byte(0x0A,22); spi_send_byte(0x0B, 0b00101000); spi_send_byte(0x0A,23); spi_send_byte(0x0B, 0b01100001); spi_send_byte(0x0A,24); spi_send_byte(0x0B, 0b01001001); spi_send_byte(0x0A,25); spi_send_byte(0x0B, 0b00101000); spi_send_byte(0x0A,26); spi_send_byte(0x0B, 0b01100001); spi_send_byte(0x0A,27); spi_send_byte(0x0B, 0b01001001); spi_send_byte(0x0A,28); spi_send_byte(0x0B, 0b00101000); spi_send_byte(0x0A,29); spi_send_byte(0x0B, 0b01100001); spi_send_byte(0x0A,30); spi_send_byte(0x0B, 0b01001001); spi_send_byte(0x0A,31); spi_send_byte(0x0B, 0b00101000); spi_send_byte(0x0A,32); spi_send_byte(0x0B, 0b01100001); spi_send_byte(0x0A,33); spi_send_byte(0x0B, 0b01001001); spi_send_byte(0x0A,34); spi_send_byte(0x0B, 0b00101000); spi_send_byte(0x0A,35); spi_send_byte(0x0B, 0b01100001); spi_send_byte(0x0A,36); spi_send_byte(0x0B, 0b01001001); spi_send_byte(0x0A,37); spi_send_byte(0x0B, 0b00101000); spi_send_byte(0x0A,38); spi_send_byte(0x0B, 0b01100001); spi_send_byte(0x0A,39); spi_send_byte(0x0B, 0b01001001); spi_send_byte(0x0A,40); spi_send_byte(0x0B, 0b00000000); spi_send_byte(0x0A,41); spi_send_byte(0x0B, 0b01100001); spi_send_byte(0x0A,42); spi_send_byte(0x0B, 0b01001001); spi_send_byte(0x0A,43); spi_send_byte(0x0B, 0b01010101); spi_send_byte(0x0A,44); spi_send_byte(0x0B, 0b01100001); spi_send_byte(0x0A,45); spi_send_byte(0x0B, 0b01001010); spi_send_byte(0x0A,46); spi_send_byte(0x0B, 0b10101010); spi_send_byte(0x0A,47); spi_send_byte(0x0B, 0b10100001); spi_send_byte(0x0A,48); spi_send_byte(0x0B, 0b01000000); spi_send_byte(0x0A,49); spi_send_byte(0x0B, 0b00000000); spi_send_byte(0x0A,50); spi_send_byte(0x0B, 0b00000001); spi_send_byte(0x0A,51); spi_send_byte(0x0B, 0b01010101); spi_send_byte(0x0A,52); spi_send_byte(0x0B, 0b01010101); spi_send_byte(0x0A,53); spi_send_byte(0x0B, 0b01010101); //Copy the character to Non Volatile Memory spi_send_byte(0x08 , 0xA0); //Wait a little while _delay_ms(200); |
Hopefully that clears up how to do it

