I’ve been wanting to build a weather station, complete with the Geiger counter I’ve been working on. Building the wind speed and direction sensor seemed like a daunting task, especially since they need to be weather tight, but have moving components in them.
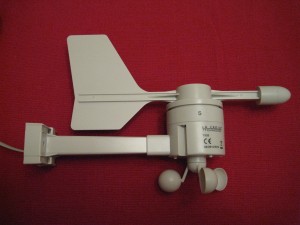
Since it’s nearly impossible to acquire an AAG or Dallas 1-wire Anemometer I decided to purchase a TX20 Wind Anemometer and use an AVR to decode the interface from it and reformat to a protocol more suitable for me.

As with any new toy, first thing on the Agenda is opening it and seeing how it works.
Disassembling a La Crosse TX20, seems relatively easy, but if not done correctly will result in a broken unit requiring glue to get it working again. I’ve learnt from my mistakes, so here’s how to open it (without requiring glue to put it back together).
First things first, the Anemometer cups seem rather brittle – I’m sure they’ll be fine outside in a strong breeze, but they’re not made to be pulled or pressed against.
Remove the plastic cap covering the screw in the top of the wind vane and undo the philips screw underneath it. If the screw is tight, unscrew it against the wind vane, not the main body of the unit.

Once you’ve removed this screw, find a small shaft screw driver (about 2mm diameter) and push it into the hole where the screw was, so it presses against the metal wind vane shaft.

Now, DO NOT pull the vane off the body of the unit – this will break things. Instead, push the screwdriver into the hole and pull the wind vane onto the screw driver. You’re trying to remove the vane without pulling on the metal shaft.
Once the vane has been removed from the unit, undo the three small philips screws holding the top onto the unit. Lift the top off the unit – If it’s tight, light top against the metal shaft so you’re not pulling on the shaft.

With the top removed, you can now do repairs or inspect the unit without causing damage.
I’ll be doing another blog post very soon with the data protocol.

If you were too rough, or had disassembled your unit without following the steps above, you’ll probably find the light pipe over the black encoder disc is broken off the PCB. If this is the case, you’ll need to carefully glue it back in place making sure not to block the light path. This needs gluing with the encoder disc in place – it seems that the disc cannot be installed once the light pipe is attached.
The light pipe is brittle, so if you need to remove the shaft from the encoder disc, make sure you press down on the disc while pulling on the shaft. It will be tight as the shaft has a key on it.
Removing the PCB is simple, and it only goes back in one way – note that the light pipe should be in line with the mounting point/cable exit hole. The cable from the PCB to the speed sensor is brittle and it’s easy to break the solder joint if you are rough.

Reassembling the unit is simple – you can press rather hard onto the shaft without damaging anything. There is a notch on the top cover which lines up with the notch at “East” on the main body. You can then insert the three screws and tighten them up.
Note that the wind vane and the shaft are keyed, so you need to line the keys up before you push the vane back onto the shaft.
That’s all there is to it.

